Have you ever thought about transforming your kitchen into a mini cheesemaking haven? Making feta cheese at home presents not just a culinary challenge but also a rewarding opportunity to craft a beloved delicacy from scratch. This guide walks you through the fascinating process of making your own feta cheese, illuminating both the artistry involved and the practical steps needed to create this tangy, crumbly delight.
Before we delve into the intricacies, let’s pose a playful question: What would your meals taste like if you possessed the ability to make your own feta cheese? Imagine the creamy richness gracing a fresh Mediterranean salad or a sprinkle enhancing a savory spinach pie. But this endeavor requires patience and precision, so prepare yourself for both the joys and challenges of homemade cheesemaking.
Ingredients Needed
The first step on your cheesemaking journey is gathering your ingredients. The following list outlines the essentials required to produce approximately one pound of feta cheese:
- Milk: 1 gallon of whole milk (preferably raw or pasteurized, but not ultra-pasteurized).
- Culture: A mesophilic starter culture (available at cheesemaking supply stores).
- Rennet: 1/4 teaspoon liquid rennet (or according to package instructions).
- Salt: Kosher or sea salt for flavor and preservation (around 1-2 tablespoons).
- Optional: Calcium chloride if using pasteurized milk.
Equipment Required
In addition to ingredients, ensure you have the right tools to execute this culinary creation effectively. Here’s a list of equipment you will find useful:
- Large stainless steel pot: For heating the milk.
- Thermometer: An accurate thermometer to track milk temperatures.
- Slotted spoon: For stirring and separating curds.
- Cheese mold: A perforated mold to shape the feta.
- Cheesecloth: For draining the curds.
- Long knife or curd cutter: To cut the curds into uniform pieces.
- Plastic containers or jars: For storing your finished feta cheese.
Step 1: Preparing the Milk
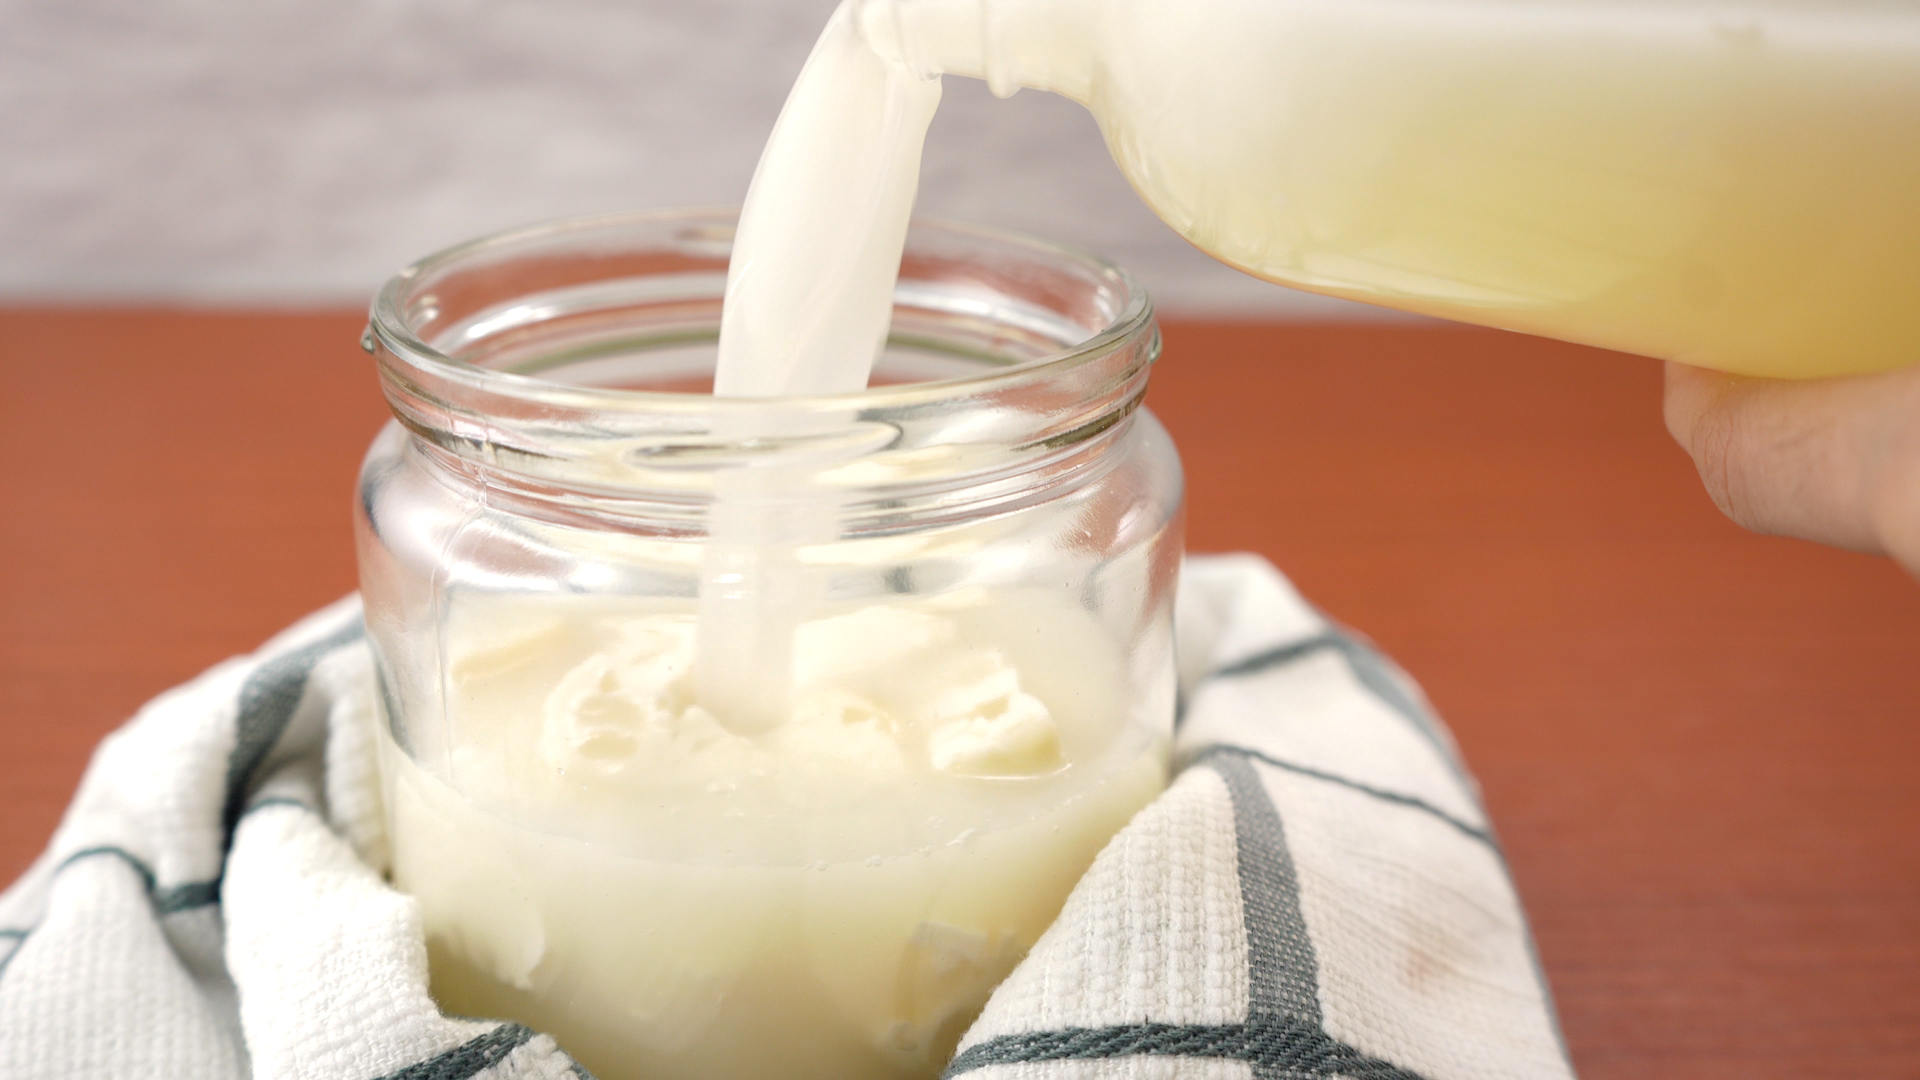
Begin by pouring the milk into a large stainless steel pot. This is where the magic starts! Heat the milk gradually over medium heat, stirring gently to prevent scorching. Your goal is to reach a temperature of about 85°F (29°C). If you’re using pasteurized milk, add calcium chloride to help restore its ability to form curds effectively.
Step 2: Adding Culture and Rennet
Once the milk reaches the desired temperature, sprinkle the mesophilic starter culture evenly over the surface. Allow it to rehydrate for about a minute before gently stirring it in a circular motion. After mixing, let the milk rest for 1 hour, giving the culture time to acidify the milk. Following this, dilute the rennet in a small amount of cool, non-chlorinated water and add it to the milk, stirring gently for approximately 30 seconds. Allow the mixture to sit undisturbed for another 30-60 minutes until you see a clean break when you insert a knife into the curd.
Step 3: Cutting the Curds
Now comes the delicate task of cutting the curds. Using a long knife, slice the curds into 1-inch cubes. Allow them to rest for about 5-10 minutes to firm up slightly. Then, gently stir the curds while maintaining a modest temperature of around 90°F (32°C). This process helps them release their whey, a vital step in achieving that signature feta texture.
Step 4: Draining the Curds
After about 30 minutes of gentle stirring, it’s time to drain the curds. Line a colander with the cheesecloth, and carefully ladle the curds into it. Allow the whey to drain for approximately 20-30 minutes, until the curds reach the consistency you desire. This is also an opportune moment to add salt to the drained curds, enhancing the flavor while also acting as a preservative.
Step 5: Molding and Salting
Transfer the drained curds into a cheese mold lined with cheesecloth, pressing gently to ensure an even shape. Cover the top with remaining cheesecloth, and place a weight on top to aid further drainage and pressing the cheese into its final form. After about 6-12 hours, remove the cheese from the mold and sprinkle additional salt on all sides to facilitate brining if desired.
Step 6: Brining and Aging
To create a classic feta, it’s imperative to brine your cheese. Combine water with coarse salt (typically a 1:10 ratio) for a saline solution. Submerge the cheese in this brine, ensuring it is fully covered. At this stage, you can either refrigerate the feta or leave it at a cool room temperature to age. For optimal flavor, allow the cheese to age for at least one week, but several weeks will deepen the flavors, enhancing the authentic feta character.
Conclusion: Celebrate Your Creation!
Congratulations! You’ve successfully made your own feta cheese — a triumph that elegantly bridges the gap between simple ingredients and gourmet results. Whether you’re crumbling it over a Greek salad, incorporating it into savory pastries, or enjoying it on a charcuterie board, your homemade feta is sure to impress. Not only have you tackled the challenge of cheesemaking, but you’ve also enriched your culinary repertoire and connected with the timeless traditions of food crafting. Now, let your imagination soar as you explore various dishes to showcase your delicious creation!


Leave a Comment