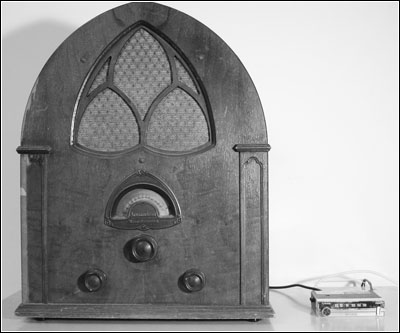
In an age where the digital clamor of smartphones and streaming services dominate the auditory landscape, the allure of antique radios remains timeless, akin to a ship whispering tales of the sea. These vintage treasures, often steeped in nostalgia, have a unique charm that transcends mere functionality. However, their inherent limitations can feel like the salt corroding a sailor’s compass, leaving one yearning for the crisp clarity of FM radio. Adding FM capabilities to your venerable radio is not just an endeavor to expand its auditory horizons; it is a voyage to meld history with modernity, breathing new life into an artifact of a bygone era.
Understanding the Antique Radio Landscape
Before embarking on this transformative journey, it’s crucial to fathom what constitutes an antique radio. Typically, these devices predate the 1960s, enchanting listeners with AM broadcasts and a rich tapestry of mechanical engineering. To integrate FM, one must grasp the fundamental differences between these two frequencies: AM (Amplitude Modulation) and FM (Frequency Modulation) diverge not only in their technical execution but also in the sound experience they provide. While AM captures the essence of distant voices with a certain warmth, FM envelops listeners in a clear and nuanced soundscape.
Gathering Your Supplies
Equipping oneself with the right tools is akin to a mariner arming their vessel for a tumultuous voyage. You will require:
- FM Converter Kit: This kit acts as the engine of your endeavor. Look for a reputable model designed to link seamlessly with vintage radios.
- Screwdriver Set: A collection of various screwdriver types will be indispensable for dismantling your radio.
- Wire Stripper: Necessary for preparing connections when interfacing the converter with your radio.
- Sound Amplifier: Optional, yet desirable for enhancing audio clarity.
- Multimeter: For verifying electrical connections and ensuring everything is functioning properly.
- Patience and Steadiness: Perhaps the most crucial tools, as precision is paramount when navigating the intricate realm of electronics.
Step-by-Step Installation Guide
With your tools in hand, it’s time to unfurl the sails and dive into the installation process. Each phase must be executed with care, reminiscent of an artisan crafting a delicate statue.
1. Safety First
Before any tinkering begins, ensure that your radio is unplugged from any power source. This precautionary measure is akin to ensuring your ship is moored securely before embarking on your journey.
2. Disassemble the Radio
Using your screwdriver set, gently remove the back panel of the radio. Take note of the layout, as nuances within the circuitry may resemble a labyrinth. Documenting or photographing the original setup will serve as a helpful reference upon reassembly.
3. Locate the Points of Connection
Identify where the FM converter will connect. Typically, this involves finding the speaker wires and antenna connection. Heavy duty connections can resemble the anchor of a ship, holding the entire structure in place.
4. Connecting the FM Converter
Attach the FM converter according to the instructions provided. Stripping the wires to expose copper connections is akin to scaling a cliff; each moment demands precision. Once connected, ensure that all wires are secured and insulated, preventing any short circuits that could derail your progress.
5. Adding an External Antenna
To unlock the full potential of FM frequencies, consider installing an external antenna. This step is akin to hoisting a flag to signal others. The location and orientation can greatly affect reception. Position it where it remains unobstructed, allowing it to reach out and capture signals that dance upon the airwaves.
6. Testing the Setup
Before sealing the radio, reconnect the power source and cautiously test the audio output. Adjust the tuning knob, listening intently as if tuning into a long-lost frequency of your favorite pirate’s tale. If you hear crisp FM signals, congratulations—you have merged epochs!
7. Reassemble the Radio
Once satisfied with the audio quality, carefully replace the back panel. Ensure that all screws are tightened, securing your work like a sailor ensuring their ship stays watertight.
Conclusion
Integrating FM capabilities into your antique radio is more than a technical enhancement; it’s an homage to the past, a bridge linking epochs separated by time yet united by sound. As your sails catch the wind of modernity, and you listen to the vibrant frequencies of contemporary broadcasts interwoven with the nostalgic melodies of yesterday, you celebrate the resilience of both craft and culture. In this exhilarating endeavor, your vintage radio may very well tell a new story, one filled with the harmonious blend of history enriched through the golden waves of modern frequencies.










Leave a Comment