In the ever-evolving realm of nail enhancements, Gel X nail tips have emerged as a beloved choice among both professionals and enthusiasts alike. These innovative extensions provide versatility, strength, and aesthetic appeal, revolutionizing how we perceive nail artistry. As you delve into this magnificent world of Gel X, you’ll uncover a wealth of information covering various aspects, including the types of Gel X tips, the application process, maintenance, and comparisons with traditional methods.
Understanding Gel X Nail Tips
Gel X nail tips are made from a flexible gel material that offers a lightweight yet durable solution for those seeking longer, more ornate nails. Unlike traditional acrylic or hard gel extensions, Gel X nails cater to various styles and preferences, enhancing the overall nail experience. The allure lies not just in their appearance but in their innovative application and removal techniques, which prioritize the health of the natural nails.
Types of Gel X Nail Tips
Exploring the intricate nature of Gel X tips reveals several formats designed to cater to different aesthetics and functional needs. Below are the predominant types:
- Full Cover Tips: These encapsulate the entire nail bed, providing a sleek, uniform look that can be painted or decorated as desired. Ideal for those seeking a seamless finish, full cover tips are versatile and highly adaptable.
- French Tip Variations: With classic French nails making a grand comeback, Gel X tips can be designed to mimic this traditional style while providing enhanced durability. French tips can be found in myriad colors and styles, ensuring endless creativity.
- Stiletto and Coffin Shapes: For the bold and daring, these shapes offer dramatic flair. Stiletto tips taper to a sharp point, while coffin styles feature a more squared-off appearance. Both lend an air of sophistication and can be artfully embellished.
- Short and Natural Options: The minimalist aesthetic is also on the rise. Short Gel X tips cater to those who appreciate understated elegance without sacrificing strength.
Application Process
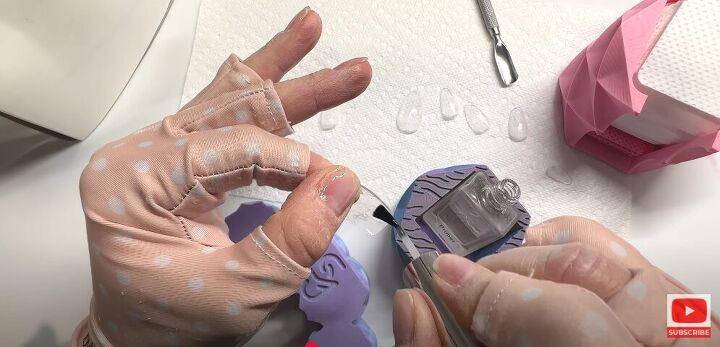
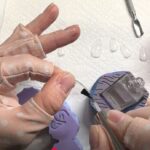
The application of Gel X tips is a nuanced procedure that, when done correctly, can yield stunning results. Here’s a step-by-step breakdown to illustrate the method:
- Prepping the Natural Nail: Begin by cleaning the natural nail, removing any oils or residues. A thorough filing of the nail surface is essential to ensure proper adhesion.
- Choosing the Right Size: Selecting the appropriately sized Gel X tips is critical. The name of the game is to ensure a snug fit along the sides of the natural nail without overhanging.
- Applying the Base Gel: A thin layer of base gel is crucial for creating a solid foundation. This gel acts as the adhesive agent between the Gel X tips and the natural nails.
- Attaching the Gel X Tip: Press the Gel X tip over the base gel and cure it under an LED lamp until fully set. This critical step solidifies the bond and extends durability.
- Shaping and Finishing: Once set, shape the tips as desired, followed by the application of a top coat for a glossy finish and added protection.
Maintenance of Gel X Nails
Just like any other enhancement, Gel X nails require diligent upkeep to preserve their beauty and functionality. Regular maintenance not only prolongs the life of the nails but also ensures the health of the underlying natural nails. Consider the following tips:
- Regular Fills: Every three to four weeks, returning for a fill will help accommodate natural nail growth and prevent lifting.
- Avoiding Excessive Moisture: Prolonged exposure to water can weaken the adhesive bond. Wearing gloves while doing household chores is an advisable practice.
- Cuticle Care: Keeping your cuticles nourished with oil aids in preventing dryness and enhances the overall appearance of the nails.
Removing Gel X Nail Tips
The removal process of Gel X tips stands as one of its most significant advantages. Unlike traditional acrylics that often require harsh chemicals, Gel X can be gently removed:
- File the Glossy Layer: Start by lightly buffing the top coat to facilitate the removal process.
- Use Soaking Method: Soak cotton balls in acetone and place them on the nail, securing them with foil. Allow this to sit for 10-15 minutes.
- Gently Ease Off the Tips: After soaking, use an orangewood stick to gently nudge the tips away from the natural nail without risking damage.
Comparative Analysis: Gel X vs. Traditional Methods
A significant advantage of Gel X over traditional nail enhancements lies in their health-conscious formulation and application methodologies. Traditional acrylics can compromise the integrity of natural nails due to their rigorous filing process and the toxic chemical ingredients involved. Conversely, Gel X’s flexibility helps mitigate the chances of breakage and damage, making it a preferable option for many.
More importantly, Gel X nails tend to feel lighter and more natural, allowing for more intricate nail art designs without the bulk that often accompanies acrylics. This transformative approach elevates not only the aesthetic but the experience of nail wearers significantly.
Conclusion
As you embark on your Gel X journey, understanding the myriad options available will empower you to express your individuality through beautiful nail artistry while prioritizing the health of your natural nails. From full cover tips to trendy shapes, the potential for creativity is boundless. With thoughtful application and regular maintenance, Gel X nail tips can transform your nail game into an elegant, enduring statement. As trends continue to evolve, Gel X stands poised to remain at the forefront of nail technology, ensuring that beauty and care go hand in hand.


Leave a Comment