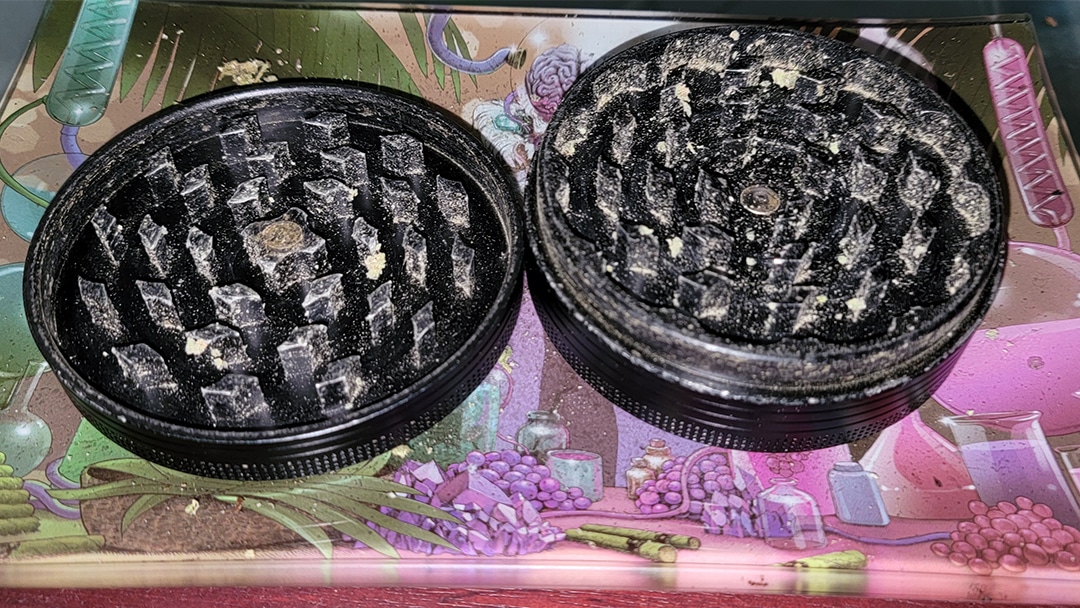
If you own a weed grinder, you know how integral it is to your cannabis experience. But have you ever asked yourself, “When was the last time I cleaned my grinder?” If you’re nodding your head, you may be facing a conundrum. A dirty grinder not only affects the taste of your product but can also impede its efficiency. Let’s dive into the nitty-gritty of keeping your grinder in tip-top shape.
1. Understanding the Anatomy of a Grinder
Before embarking on your cleaning journey, familiarize yourself with the components of your grinder. Most models consist of two or more pieces: the lid, the grinding chamber, and a catching chamber for the ground herb. Some have additional features like kief collectors or screens. A basic understanding of these parts allows you to clean each section thoroughly.
2. Gather Your Cleaning Supplies
Preparation is crucial. Ensure you have the following items at your disposal:
- A small brush (an old toothbrush works wonders)
- A bowl or container for collecting debris
- Isopropyl alcohol (preferably 91% or higher)
- Warm soapy water
- Paper towels or lint-free cloths
- A toothpick or a similar tool for stubborn residue
3. Disassemble Your Grinder
The first step in cleaning is disassembly. Carefully separate your grinder into its components: top, middle, and bottom sections. If your grinder has a kief catcher, don’t forget to remove that part too. Examine all pieces for trapped debris; even the smallest remnants can obstruct the grinder’s functionality.
4. Remove Trapped Material
Using your small brush, gently sweep out any leftover herb from the grinding chambers. Be meticulous; this is where old plant matter clings on. The kief collector can be knocked against a flat surface to dislodge powder. Utilize a toothpick to gently pry out stubborn clumps from crevices, ensuring not to mar the surface.
5. Choosing Your Cleaning Method
Depending on the state of your grinder, you may opt for one of the following cleaning methods:
- Isopropyl Alcohol Soak: For a deeper clean, especially if the resin is stubborn, submerge the pieces in isopropyl alcohol for 30 minutes to an hour. This will dissolve sticky residue, making it easier to scrub.
- Soapy Water Method: If you prefer a non-toxic approach, wash the grinder pieces in warm soapy water. Let them soak for about 10 minutes before scrubbing.
6. Scrubbing the Components
Post-soak, it’s time to scrub! For the alcohol method, use your brush to sweep away any remnants of residue. Check each piece carefully, ensuring you clean the threads where they screw together, as grime may accumulate there, affecting functionality. In the soapy water approach, after scrubbing, rinse thoroughly under warm water to remove any soap residue.
7. Final Rinse and Dry
After scrubbing, rinse each component thoroughly. This step removes any lingering cleaning solution, which is vital to ensure your next use is clean and safe. Once rinsed, dry each part meticulously using paper towels or a lint-free cloth. Ensure that no moisture remains, as this can lead to mold and mildew, especially if you store your grinder with fresh herb.
8. Reassemble and Test
With your grinder sparkling, it’s time to reassemble all components. Once put back together, give it a test spin. Check for smoothness; it should rotate without obstruction. If it feels stiff, a little mineral oil can ease the movement, but be careful not to allow any oil residue to mix with your herb.
9. Regular Maintenance: A Preventative Approach
Cleaning your grinder should not be an infrequent endeavor. Schedule regular maintenance sessions to keep your grinder pristine. After every few uses, or at the very least once a month, take a few moments to brush out excess material. This minimizes buildup, making your deep cleaning sessions less frequent and far less daunting.
10. Consideration for Your Grind
Certain types of weed grinders, especially those made from plastic, may require different care than their metal counterparts. For plastic grinders, avoid soaking them in alcohol as it can cause degradation. Instead, a gentle scrub with warm, soapy water is the way to go. Always consult the manufacturer’s guidelines for specific cleaning instructions.
Conclusion: Enjoy a Smoother Experience
Properly maintaining your grinder not only prolongs its lifespan but enhances the quality of your herb experience. By implementing these steps, you can sidestep the potential challenge of obstructive residue and enjoy that freshly ground herb whenever the mood strikes. After all, it’s not just about grinding; it’s about enjoying your herb to the fullest. So, are you ready to give your grinder the care it deserves?


Leave a Comment