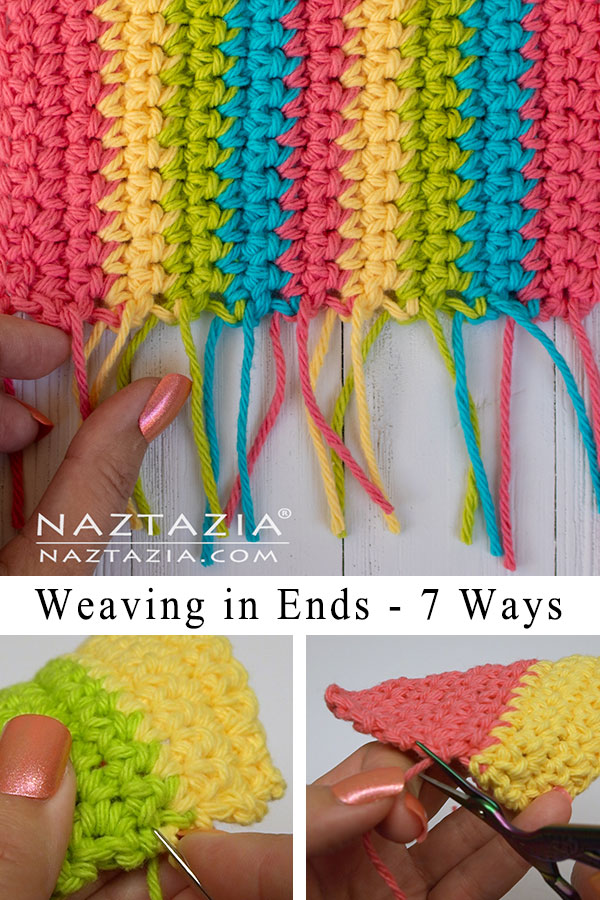
When it comes to the art of crochet, finishing techniques hold significant importance in achieving a polished and professional look. One particular aspect that often perplexes both novices and seasoned crocheters alike is the process of weaving in ends. It’s a seemingly simple task, yet it invites a myriad of questions: How do I ensure my strands remain secure? What is the best technique to avoid unraveling? Here we delve into the intricate world of weaving in ends, a craft that, when mastered, can elevate your crochet projects from adequate to impressive.
Firstly, understanding the significance of weaving in ends cannot be overstated. These loose yarn ends can detract from the overall aesthetic of your work. They can lead to unraveling, fabric inconsistencies, and even unraveling disasters. By mastering the technique of weaving in ends, you not only enhance the durability of your piece, but also refine its visual appeal. But where should you start?
**Step 1: The Importance of Good Preparation**
Preparation is key when weaving in ends. Before you even consider the actual weaving motion, ensure that your yarn is cut to a length that allows for manipulation. A tail measuring approximately four to six inches is usually sufficient. Leaving longer tails may lead to unnecessary bulk, while shorter tails risk unraveling. You want just the right amount to work with—enough to secure, yet not so much that it becomes unwieldy.
**Step 2: Choose Your Tool Wisely**
Different projects may call for different tools when weaving in ends. For most crocheters, a tapestry needle is the go-to instrument. However, for those working with finer yarns or intricate designs, a smaller needle may be more appropriate. The needle’s size should complement the yarn weight to facilitate a smooth weaving experience. Consider the hook used — if it is bulky, coupling it with a similarly robust needle may yield optimal results.
**Step 3: Identifying the Weaving Path**
With your yarn prepared and your needle chosen, it’s time to consider how to weave. The first decision is in identifying the direction of your weave. Aim to work within the stitches of your crochet piece. By following the natural path of the stitches, particularly in a zigzag or diagonal fashion, the ends can be effectively hidden, creating an aesthetically pleasing finish. The stitches themselves provide a natural guide, allowing you to blend your ends seamlessly into the fabric.
**Step 4: The Weaving Technique**
Now comes the crux of the matter: the actual weaving technique. Thread your tapestry needle with your prepared tail and begin the process. Insert the needle into the back of a stitch and out through the front, capturing fibers from both the base stitch and the surrounding stitches. It’s akin to gently coaxing the yarn into a snug embrace with the fabric of your project. This technique gradually secures the loose end while maintaining the integrity of the overall structure.
Alternate your path for versatility. Rather than weaving in one linear direction, consider switching it up by weaving up, down, and sideways. This method enhances stability and minimizes the chance of the end working its way free, a clever way to weave a tapestry of security into your crochet masterpiece.
**Step 5: The Final Touches**
After weaving the ends securely, it’s time to consider the final touches. It’s essential to ensure that the tail is snug but not overly tightened, which could distort the fabric. Trim any excess yarn to a neat finish, but avoid cutting it too close to the stitches, as this could result in sneaky unraveling. A good rule of thumb is to leave about an eighth of an inch from the fabric’s surface.
**Step 6: Blocking for a Professional Finish**
The magic of blocking cannot be overlooked when it comes to providing your crochet work with that polished finish. After completing the weaving process, block your piece to ensure that any unevenness caused during weaving is smoothed out. This step not only enhances the aesthetics but also sets the fibers in place, maintaining the integrity of your laborious efforts. Methods of blocking vary from steam blocking to wet blocking; choose one that suits your yarn type and comfort level.
**Step 7: Preventing Future Frays**
As you develop your skills in weaving in ends, consider implementing preventative measures for future projects. Utilize yarn that matches the current project while being mindful of durability. Choose high-quality fibers that resist fraying, thereby minimizing the frequency of weaving ends. Additionally, consider securing the end with a drop of clear fabric glue or fray check if the project allows it. These protective agents can provide an extra layer of assurance, keeping your hard work intact.
**Conclusion: The Art of Weaving in Ends**
Weaving in ends may seem like a tedious detail for those new to crochet, yet it unfolds into an essential skill that reflects your dedication to the craft. By mastering this technique, you not only perfect the aesthetics of your crochet work but also instill a sense of pride in your craftsmanship. Embrace the process, practice with intention, and watch as your crochet transforms into a seamless tapestry of skill and artistry. Every stitch, every weave tells a story — make sure yours is a masterpiece.


Leave a Comment