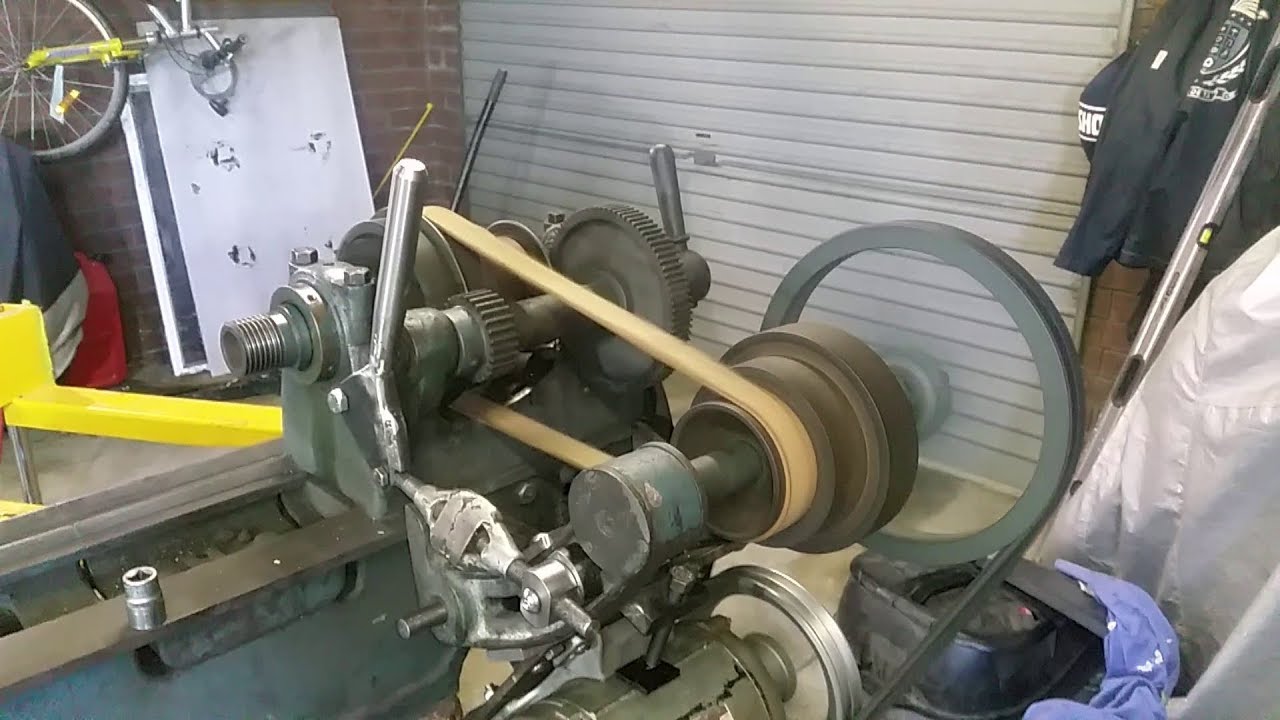
In the world of woodworking and metalworking, a lathe is akin to an artist’s canvas, enabling the sculpting of intricate forms from raw materials. Much like an orchestra that requires a conductor to maintain harmony, a lathe relies on its belt to function seamlessly. However, akin to the strings of a bow that may fray over time, so too can the belts of a lathe deteriorate, leading to diminished performance and, thus, frustration for the craftsman. Replacing a lathe belt might seem like an arduous endeavor, yet with the right guidance and tools, it becomes a manageable task that can revitalize your machine. Herein lies a comprehensive guide to successfully navigate the process of replacing a belt on your lathe.
1. Gather Your Tools: The Building Blocks of Your Adventure
Much like an explorer must equip himself with the necessary gear to traverse uncharted territories, you’ll need an array of tools before embarking on your belt replacement journey. Gather the following:
- Wrenches: A set of adjustable wrenches to loosen and tighten bolts.
- Socket set: For more intricate fastening or unfitting tasks.
- Screwdrivers: Both flat and Phillips to address any screws securing covers or components.
- Replacement belt: Ensure it is the correct size for your lathe model. Check your manufacturer’s specifications.
- Safety gear: Safety glasses and gloves to protect against debris and injuries.
2. Safety First: The Bedrock of Any Task
Before diving headfirst into the task, don your safety gear with diligence. The old adage, “an ounce of prevention is worth a pound of cure,” rings true here. Disconnect the machine from its power source, akin to silencing a raging river before attempting to cross it. This simple act not only safeguards you from electrical hazards but also paves the way for a smooth replacement operation.
3. Remove the Lathe’s Cover: Peeling Back the Layers
As a sculptor meticulously strips away the outer layers of stone to reveal the masterpiece within, you must carefully remove any covers concealing the belt. Depending on your lathe model, this may involve unscrewing several screws or bolts. Keep these fasteners organized, as they are the unseen stitches in the fabric of your machine.
4. Inspect the Old Belt: The Signs of Wear and Tear
Before disposing of the old belt, examine it with the scrutiny of a detective evaluating clues. Look for signs of fraying, cracking, or stretching—indications that the belt has served its time well. Understanding the condition of the old belt can provide insight into how often replacements may be necessary in the future.
5. Remove the Old Belt: Breaking the Bonds
To free the old belt, begin by loosening any tension adjustments. This process is reminiscent of releasing a tightly-bound bowstring before making a precise shot. With the tension relieved, gently slip the belt off the pulleys, taking note of the routing of the belt. It’s essential to memorize or document this path, as it will inform the placement of the new belt.
6. Install the New Belt: Reweaving the Machinery
With the old belt now cast aside, it’s time to weave the new belt into place. Make sure the new belt mirrors the routing of the old. Ensure that the belt fits snugly around the pulleys but is not overly tight, reminiscent of a well-fitted suit that provides comfort without restriction. Adjust the tension as required, ensuring that inefficiencies do not mar the performance of your lathe.
7. Reattach the Cover: Shielding Your Work
Like a protective cloak that guards a knight, the lathe’s cover serves to shield the inner workings from dust and debris. Secure it back into place with the appropriate screws or bolts, ensuring that everything is fastened adequately. A well-covered lathe will operate for years without succumbing to the wear of the elements.
8. Test the Lathe: The Moment of Truth
Having completed the task at hand, it’s time to reconnect your lathe to its power source and perform a test run. As you bring it to life, listen attentively as the machine hums—this is the sound of potential, of art waiting to be created. Ensure that the new belt functions seamlessly, responding to your commands with the precision of a finely-tuned instrument.
9. Maintenance: Nurturing the Relationship
With a new belt in place and functionality restored, don’t neglect the overall maintenance of your lathe. Regular inspections of the belt, lubrication of moving parts, and careful cleaning will extend the lifespan of your machine. Before long, you will find that nurturing this relationship keeps your lathe in top condition, ready to transform raw materials into works of art.
In conclusion, replacing a belt on a lathe may initially appear daunting, yet with the right tools, careful attention, and a methodical approach, the task can be performed with relative ease. Much like the intricacies of a dance, each step in this process builds towards a harmonious resolution—one that rekindles the spirit of creativity within your workspace. Embrace the opportunity to rejuvenate your lathe; it is not merely a mechanical device but a vessel for the craftsmanship that flows from your hands.







Leave a Comment