In the realm of poultry farming, a delightful yet occasionally perplexing query emerges: Have you ever considered how those seemingly mundane hen eggs transform into vibrant chicks? The magical process can be fraught with trials, particularly when it comes to the use of an incubator for hen eggs. This endeavor, while rewarding, can sometimes feel like navigating uncharted waters. Are you ready to embark on this adventure? What if we told you that your success hinges not just on the eggs themselves, but also on the incubator you choose and the conditions you create?
In this comprehensive guide, we will delve into the intricacies of incubating hen eggs, exploring the types of incubators available, the importance of environmental conditions, the care necessary for successful hatching, and the common pitfalls that may arise. Let’s transform those eggs into adorable chicks, shall we?
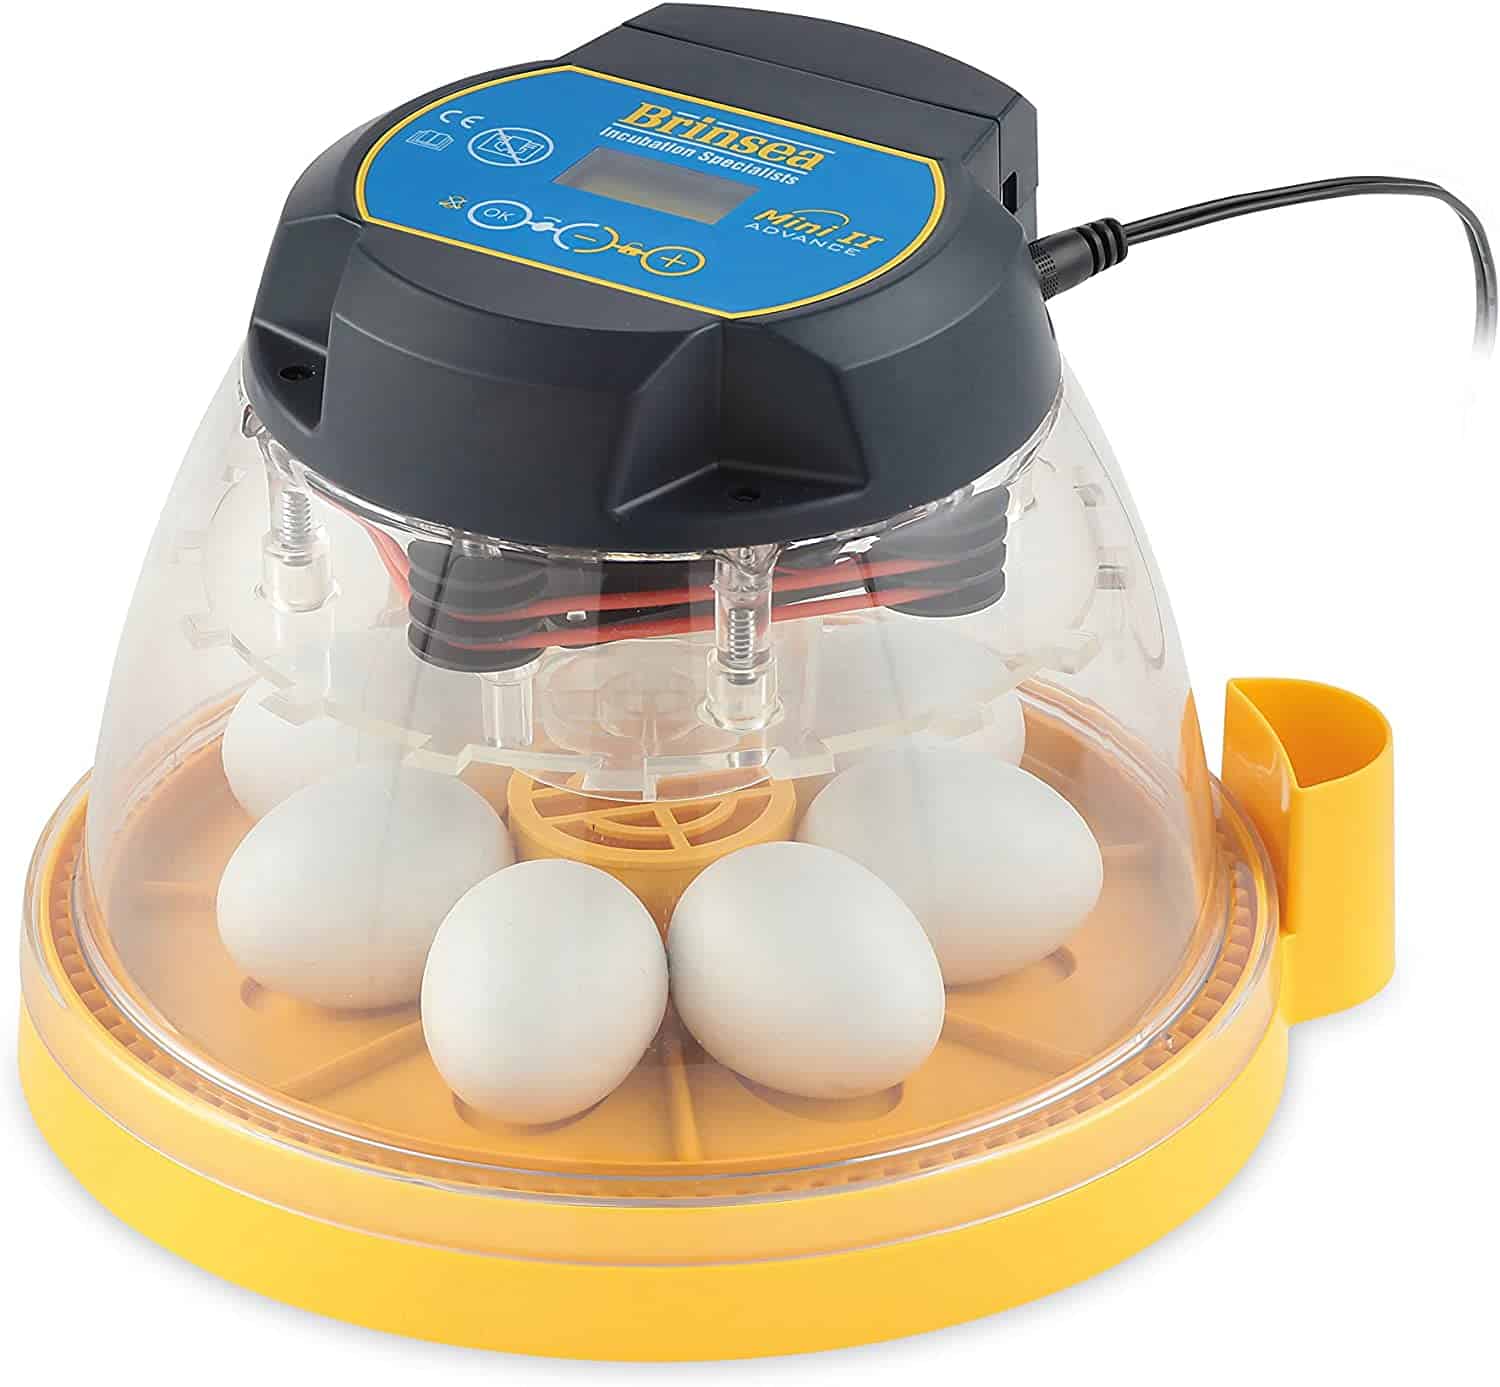
1. Understanding Incubators
Incubators are sophisticated devices designed to mimic the natural conditions a hen provides while incubating her eggs. They function through a precise balance of temperature, humidity, and ventilation. This brief overview will help you appreciate the technology behind this essential tool:
- Types of Incubators: There are several types of incubators, including tabletop and cabinet models. Tabletop incubators are suitable for hobbyists, accommodating smaller egg quantities, whereas cabinet incubators are designed for serious breeders and can handle hundreds of eggs.
- Manual vs. Automatic: While manual incubators require you to turn the eggs periodically, automatic models do this for you, significantly reducing the labor involved, especially for newbies.
- Cost Considerations: Incubator prices range from economical models for beginners to high-end versions with advanced features. Assess your budget and determine what level of investment you’re willing to make.
2. Preparing the Incubator
Once you’ve selected your incubator, preparation is critical. This stage sets the foundation for your eggs’ future. Here’s what to focus on:
- Location: Position your incubator in a stable environment. Avoid areas with drastic temperature fluctuations and ensure ample space for proper ventilation.
- Calibration: Before introducing eggs, calibrate your incubator. Set the temperature between 99°F to 102°F (37.2°C to 38.9°C) and ensure humidity levels are within the optimal range of 40% to 50% for the majority of the incubation period.
- Monitoring Tools: Invest in reliable thermometers and hygrometers to keep an eye on your incubator’s environment. Digital devices often provide the most accurate readings.
3. Selecting and Preparing the Eggs
The eggs themselves are perhaps the most vital component of this entire process. Selecting the right eggs is paramount:
- Grade A Eggs: Choose only fresh, fertilized, and clean eggs. Avoid any eggs with cracks, as these may compromise the incubation process.
- Storage: If you’re not placing the eggs in the incubator immediately, store them pointed end down in a cool, dry place, ideally at a temperature of 55°F (13°C).
- Turning the Eggs: If using a manual incubator, remember to turn the eggs at least three times a day to prevent the embryo from sticking to the shell.
4. The Incubation Process
The incubation period for hen eggs usually spans about 21 days. During this time, meticulous attention to detail will dictate your success:
- Temperature Control: Consistently monitor and adjust the temperature. Sudden spikes or drops can lead to failed hatching.
- Humidity Management: Approximately halfway through the incubation period, increase humidity to about 65% for optimal hatching conditions. This helps soften the eggshell for the chicks.
- Ventilation: Ensure proper airflow within the incubator. Stagnant air can lead to malpositioned embryos and compromised health.
5. Hatching Day
As the much-anticipated hatching day approaches, excitement mingles with anxiety. Here’s what to expect:
- Lockdown Phase: On day 18, stop turning the eggs and increase the humidity. This is known as the lockdown phase, where the chicks prepare to break free.
- Patience is Key: Chicks can take anywhere from a few hours to a full day to hatch. Don’t be alarmed if you see them making progress but not emerging immediately.
- Avoiding Interference: Refrain from opening the incubator during this critical phase. Any disturbance can lead to failed hatching.
6. Post-Hatch Care
Once the chicks have hatched, the adventure continues. Post-hatch care is essential for their healthy development:
- Brooder Setup: Transfer the chicks to a brooder where they can stay warm, dry, and safe. An ideal temperature starts at around 90°F (32°C) in the first week, decreasing as they grow.
- Nutrition: Provide high-quality chick starter feed to facilitate healthy growth and development.
- Socialization: Chicks thrive when housed in a group. Ensure they’re not isolated to support their mental well-being.
The journey from the humble egg to a sprightly chick is wondrous. However, it’s not without its challenges. The right preparation, equipment, and knowledge can make all the difference. By diligently following the guidelines provided, you can increase your chances of nurturing healthy, happy chicks. Explore the world of incubation, and who knows? You may find joy in the unexpected twists and turns of this captivating process. Happy hatching!


Leave a Comment