Brake pads are a vital component of your vehicle’s braking system, orchestrating the balance between performance and safety. Yet, they often remain overlooked until an alarming sound or a pulsating brake pedal captures our attention. Understanding how to check brake pads, however, not only enhances your vehicle’s safety but also deepens your inner workings of automotive knowledge. This curiosity about the mechanics behind brake pads can reveal a realm of fascinating nuances and technicalities that standard car maintenance often glosses over. Below is a comprehensive guide on how to check your brake pads effectively.
1. Recognizing the Importance of Brake Pads
Brake pads play a crucial role in ensuring your vehicle halts efficiently. When you press the brake pedal, hydraulic fluid transmits force to the brake calipers, which in turn squeeze the brake pads against the rotors. This friction generates the necessary stopping power. Over time, this wear and tear necessitate regular checks and potential replacements to maintain optimal functionality. Delving into the mechanics enhances appreciation for automotive design.
2. Gathering Necessary Tools
Before embarking on your inspection journey, assemble the appropriate tools. You will require:
- A jack and jack stands
- A lug wrench
- A flashlight
- A ruler or a brake pad thickness gauge
- Optional: A wheel chock for enhanced safety
With these tools in hand, you are prepared to delve into the intricacies of your brake pads.
3. Safety First: Preparing to Inspect
Before lifting your vehicle, ensure it is parked on level ground. Engage the parking brake and place wheel chocks behind the rear wheels to prevent any unintended movement. Once the vehicle is secure, proceed to loosen the lug nuts of the wheel you will be inspecting, but do not remove them completely. Following this precaution protects you from potential mishaps.
4. Lifting the Vehicle
Utilize the jack to lift the vehicle. Once elevated, securely place jack stands underneath for added safety. Never rely solely on the hydraulic jack; this is a cardinal rule in any automotive inspection. Your safety is paramount, and this precaution cannot be understated.
5. Removing the Wheel
Once secured on jack stands, fully remove the lug nuts and take off the wheel. This action exposes the brake assembly, placing you in direct contact with the brake pads. This immediate interaction fosters a deeper understanding of the braking system.
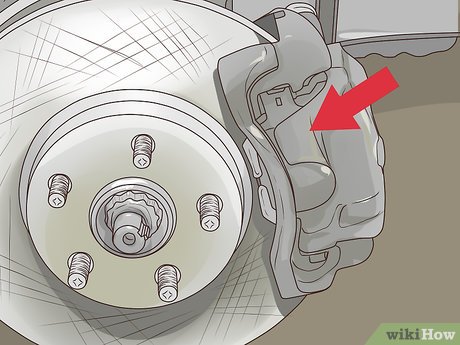
6. Examining the Brake Pads
With the wheel removed, inspect the brake pads thoroughly. Look for the following:
- Thickness: Ideally, brake pads should have at least 1/4 inch of material left. If they appear thinner than a quarter inch, it is time for a replacement.
- Even Wear: Check for uniform wear across the pads. If one side shows significantly more wear, it may indicate issues with the caliper or alignment.
- Cracks or Damage: Inspect for any visible cracks or signs of degradation. Such damage can impair performance and signal the need for urgent replacement.
- Squeaking or Groaning Sound: While this pertains more to auditory clues, it’s worth noting that brake pads emitting sound might indicate they’re worn down or glazes due to excessive heat.
7. Utilizing a Brake Pad Thickness Gauge
For precise measurements, a brake pad thickness gauge provides a quantitative assessment of the pad’s material. Slide the gauge between the brake pad and rotor to ascertain the thickness. This clarity offers a more informed decision regarding replacements, moving beyond mere observation.
8. Checking the Rotors
As you inspect the brake pads, don’t overlook the condition of the rotors. Check for any discoloration, warping, or grooves. Uneven rotors can negatively impact brake pad performance, thereby necessitating further examination or replacement.
9. Reinstalling the Wheel
If the brake pads appear satisfactory, or you have completed replacements, carefully reinstall the wheel. Position it onto the hub, followed by threading the lug nuts back on. Ensure they are snug but don’t fully tighten them while the vehicle is still elevated.
10. Lowering the Vehicle
Using the jack, carefully lower the vehicle back to the ground. Once the vehicle is securely placed on the ground, apply appropriate torque to the lug nuts using your wrench for a secure fit. This final step guarantees that your wheel is firmly attached, ensuring safe operation.
Conclusion
Understanding how to check brake pads is not merely a mechanical task; it equates to safeguarding your vehicle and its occupants. The satisfaction derived from grasping the complex interplay of components within your vehicle fosters a deeper connection with automotive care. Whether you opt to undertake these checks yourself or enlist professional assistance, this knowledge empowers you in making informed decisions about your car’s maintenance. Regular inspections can mean the difference between minor adjustments and major repairs. Embrace the fascination with your vehicle’s brakes; it is truly the unsung hero of your automotive experience.


Leave a Comment