Have you ever found yourself in a precarious situation, knee-deep in water, with a toilet leak threatening your tranquility? The thought of rushing to turn off the water can indeed trigger a flurry of anxiety. What if you don’t know how? How can you ensure that you are not adding fuel to the flooding fire? Fear not; this guide is designed to equip you with all the knowledge necessary to confidently conquer this bathroom challenge.
Turning off the water to a toilet is a vital skill for any homeowner. Whether addressing a leaking toilet, replacing parts, or simply engaging in routine maintenance, knowing how to cut off the water supply is crucial to preventing further mishaps. In this guide, we will explore the entire process in a detailed, step-by-step manner, ensuring you can master this task with ease.
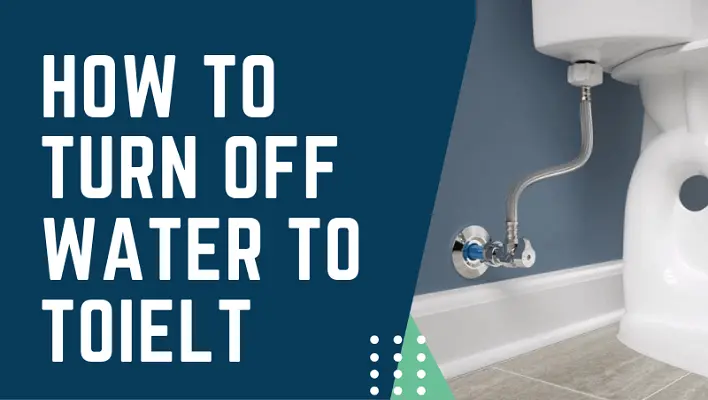
Step 1: Identify the Toilet Water Supply Valve
The first step in your water-off mission is locating the toilet’s water supply valve. This is often a small, chrome or brass knob situated on the wall at the back of the toilet or directly beneath the tank. It’s typically a quarter-turn type of valve, meaning it will require only a slight twist to shut it off. Familiarizing yourself with this valve can save you a considerable amount of panic during emergencies.
Step 2: Assess the Valve’s Condition
Before attempting to turn the valve, take a moment to inspect its condition. Look for any signs of rust, corrosion, or leaking. A valve in disrepair may be stubborn or challenging to turn. If you notice that the valve is in poor shape, consider exponential caution as turning it could exacerbate existing issues. If necessary, have a professional plumber examine the valve to avoid exacerbating the situation.
Step 3: Preparing for the Turn-Off
Before you make your move, it’s prudent to have a few tools on hand. A towel may be handy for any incidental spills, and a pair of pliers could assist if the valve is tricky to manipulate. In retrospect, gathering these items beforehand will streamline the process, creating an environment of preparedness and confidence. Relax your mind; you’re armed with the knowledge and tools necessary to complete the task.
Step 4: Turning Off the Valve
When you feel ready, grasp the valve firmly. If it’s the quarter-turn type, twist it clockwise until it stops. This action effectively halts the flow of water to the toilet. For some, this step may present a challenge if the valve is tarnished or fused; a little elbow grease may be required. If using pliers to turn the valve, ensure the application of pressure is gentle, as excessive force could damage the valve further.
Step 5: Verify the Water Supply is Off
Once you’ve turned the valve, it’s essential to verify that the water supply has been successfully cut off. Remove the toilet tank lid, and flush the toilet. Allow the tank to refill and observe if water continues to flow. If the tank fills up without water spilling into the bowl, congratulations! You’ve successfully transitioned from potential disaster to meticulous management of your bathroom.
Step 6: Addressing Any Remaining Water
Even with the valve turned off, residual water may linger in the tank or bowl. Utilize your towel to absorb any lingering moisture and keep the workspace dry. If you’re planning repairs or part replacements, be prepared to catch and contain any remaining water. A sponge or bucket is an excellent tool to have on standby for this very task.
Step 7: Complete Your Repairs or Maintenance
With the water supply efficiently halted, you can proceed with whatever tasks your toilet requires—be it replacing the flapper, repairing a leak, or adjusting the float mechanism. Embrace this opportunity to undertake some basic plumbing, equipping yourself with skills that enhance your DIY prowess.
Step 8: Restoring the Water Supply
Once your work is complete, it’s time to reinstate the flow of water to your toilet. Return to the shut-off valve and turn it counterclockwise until it stops. You may want to double-check connections to ensure nothing was loosened during your repairs. Run a test flush to confirm that everything operates as it should, and celebrate your success!
Turning off the water to your toilet can initially seem daunting, but it is a straightforward task that every homeowner should know how to accomplish. By following these steps with diligence and a bit of patience, you can turn a potential catastrophe into a smooth-sailing experience. Always remember to maintain your fixtures and assess them regularly to mitigate future challenges.
Now that you possess the knowledge to turn off the water to your toilet effectively, consider this your initiation into the world of home maintenance. With practice, you’ll not only safeguard your home from water-related stressors but also build a toolkit of skills that can empower you in many future home improvement endeavors.


Leave a Comment